
Being Wise with Readwise
This post is about how I make the best of Readwise.io, a service that works with your notes and highlights to enhance recall, reflection, inspiration, and creation.
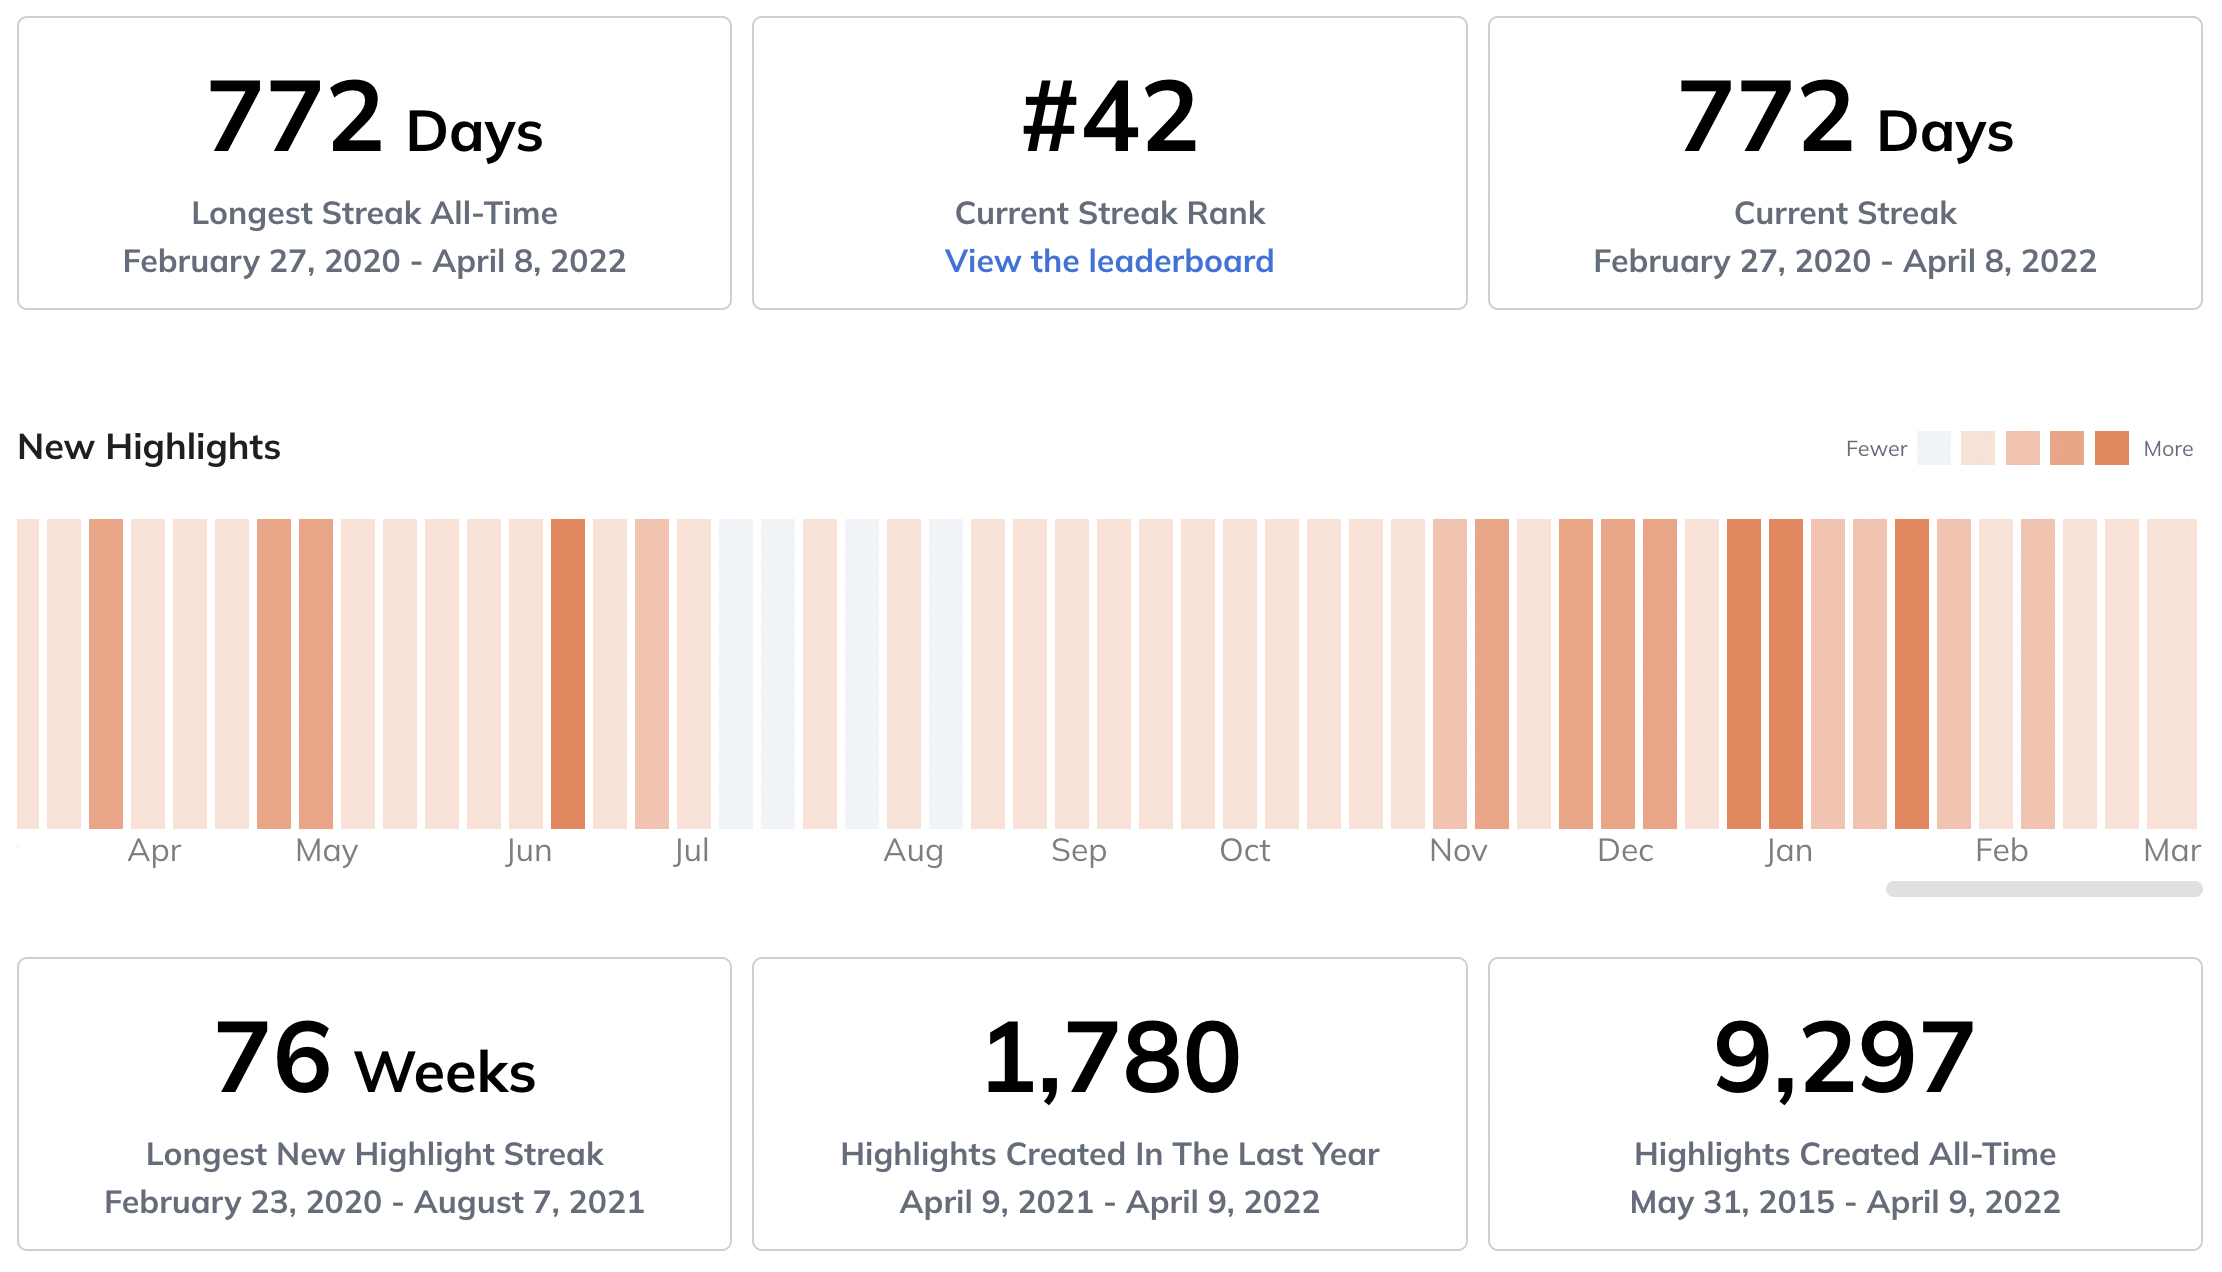
If you don’t already use Readwise, I highly recommend it! You and I both get a free month with my affiliate code. As you can see, I use Readwise consistently:
I will cover:
- Getting Things In: making all your highlights and notes available
- Making Highlights and Notes: tips for capture and organizing
- Getting Things Out: making backups and data available in your notes system
- Working with Ideas: making the most of your highlights and notes
Getting Things In
My first principle for Readwise is:
Send Everything In
In other words, I want all my reading notes and highlights to end up in Readwise. I even want to supplement my notes and highlights with those that others are making! The system grows in value as more of your important items are included, both because of your ability to search the content and because of the network effects from different notes being available together. (We’ll explore this more in Working with Ideas).
Here are the steps:
1. Connect All Your Services
Once you have an account, head to the import page and turn on connections for any services you use.
For me, that means:
- all the places I read digital books (Kindle, Apple Books, Libby, and Kobo)
- all the places I read things other than books (Instapaper/Pocket, Twitter, Medium, Web Highlights, Inoreader/Feedly, and the new Reader service from Readwise)
You might use other services and want to connect other them as well. Some additional examples:
(Side Note: Some of the connectors might even inspire you to try a new service, so Readwise has started partnerships offering discounts on services.)
2. Import Other Highlights
Not everything has a connector, yet. Even so, there is still probably an option to get those highlights and notes into Readwise. These options are also found on the import page.
For physical books, I use the mobile app (iOS, Android) and its OCR to import from my notes and highlights. Another alternative is the CSV or Email import option. I always add the location or page # field, because the structure and order of the highlights is often helpful later on (for context, etc.)
There are other non-connector imports as well, such as pdfs, Scribd, O’Reilly, Google Play Books, and “my clippings” for direct files in your Kindle.
You might even use the API to meet your needs:
“Our API supports creating, fetching, and updating highlights on behalf of the user.”
3. Get Other People’s Highlights
What if I finished a book a while ago and didn’t take highlights or notes? What if I listened to an audiobook? Maybe I just want to see other Readwise users’ highlights?
In these cases, you can use the “Supplemental Books” feature, also found on the import page.
Note: if you connect Goodreads in Step 1, everything you finish in Goodreads will automatically get added as a supplemental book in Readwise.
I do not use Goodreads anymore, so when I finish a non-fiction book where I didn’t take highlights or notes, I head over to the Supplemental Books tab and add the book. If no other Readwise user has made highlights, yet, I make a note in tasks to try again later.
In later sections, we’ll talk more about how these supplemental books are part of the ecosystem.
WARNING: some publishers lock down how much you can highlight and export from a book. This is not a Readwise problem, but it does affect Readwise. Just in case I run up against limits, I make a habit not to make really long highlights nor to over-highlight a book. These are generally good practices, anyway, as they limit your highlights to readable sections and just the really good stuff.
Making Highlights and Notes
The second principle for Readwise is:
Start Simple
This section will includes tips for how to use more advanced highlighting and note-taking features, but you can ignore it entirely or start using the tips as they help you. You might have a finely-honed method that you don’t wan’t to disturb. That’s fine: start there. Come back here went you want to use new features or enhance your process.
Organizing
When you’ve highlighted & annotated a long document or book, you’ll automatically have all those notes available to you, whether in the collection on the web, in daily review, or in your exports. But if you’re like me, you’d like to have a bit more structure, when you are looking at the overall document highlights.
This is where headings come in.
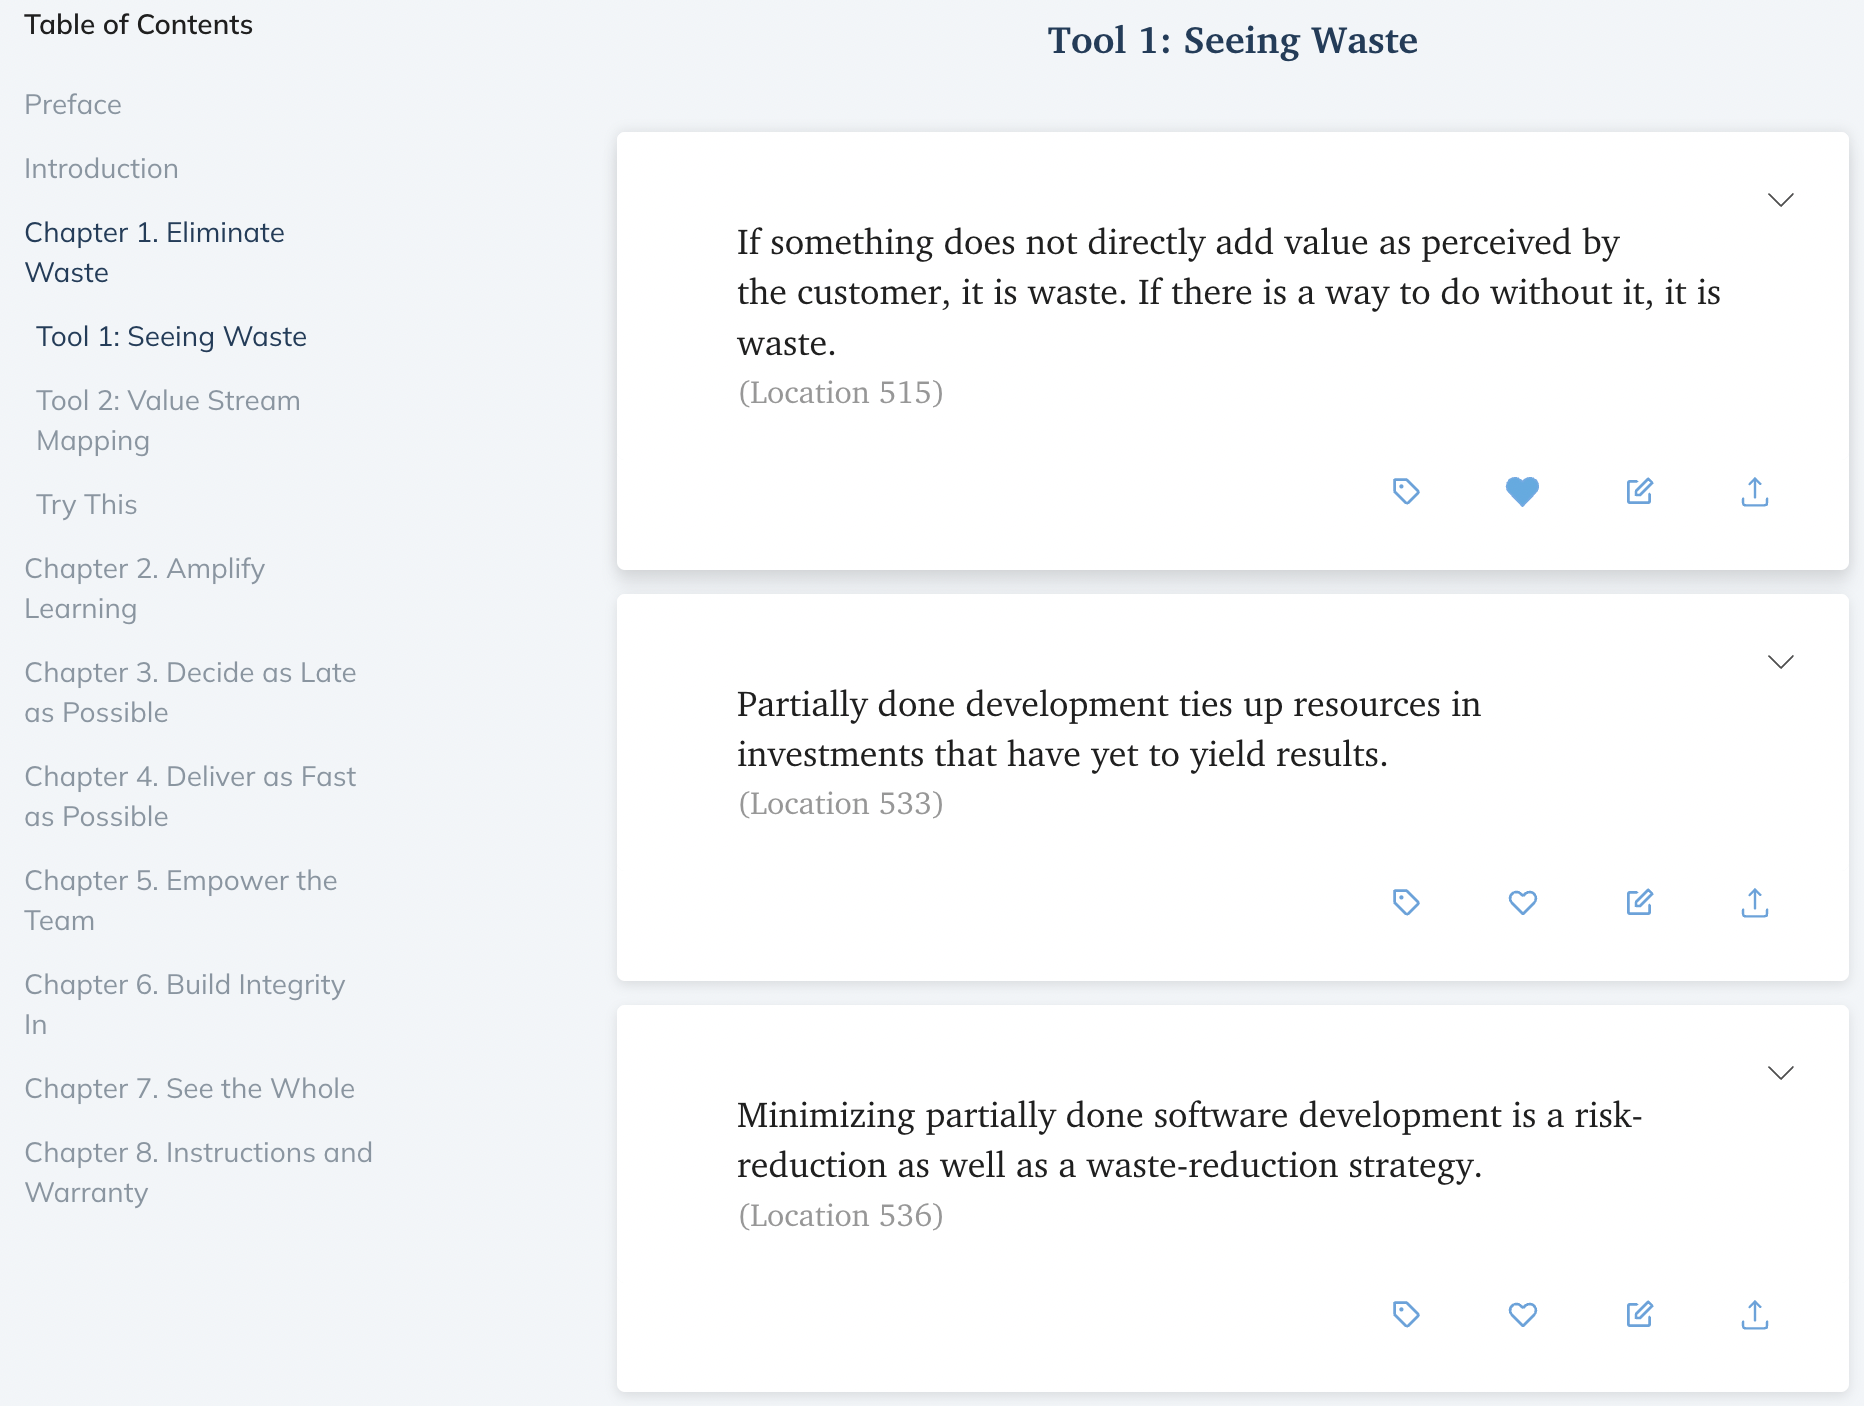
Headings allow you to structure your highlights at three different heading levels. A common pattern is to call out a Part as heading level 1, a Chapter as heading level 2, and a Section as heading level 3. Then, you’ll have a nice table-of-contents and structure for your notes.
To use this organizational structure, add a note of “.h1”, “.h2”, or “.h3” to the highlight that you want to turn into a heading. The period before the “h” tells Readwise to treat your note as a tag, not your commentary, and it then processes the highlight as a heading instead of a normal highlight.
Here’s an example from Lean Software Development where I used heading 1 for chapters and heading 2 for agile Tools and “Try This” activities.
Note: I generally avoid using heading 3. It is often too much. Make the choice based on your document and whether you’ll get value out of it.
WARNING: this is one area of Readwise that has some bugs remaining. Because the header tags get applied a special way, it’s important to enter the tags accurately and in order as you work through the document. I have some books where the heading structure is messed up and it’s not something you can fix fully in the web app. When this happens, you can delete and re-synch your book or document highlights, but this is a pain if you’ve already edited (with tags, commentary, etc.) the comments within Readwise, or already returned the digital book to the library. Hopefully this is something they are fixing in in the new Reader experience.
Want to know more about headings? See their blog post on headings if you would like a more detailed explanation.
Tags
You already learned about a special tag: headings. There’s another special tag: concatenation.
Have you ever found a long chunk of text but really just want parts of it? Concatenation lets you highlight that way. Use “.c1”, “.c2”, “.c3” etc. notes to build a highlight that combines them. Readwise will show ellipses between the parts in the final highlight. (Read their blog post about concatenation here)
Normal tags are created the same way as the special ones: while highlighting, add a “.” note, followed by how you’d like to tag the highlight. For example, I use “.i” for “inbox” and “.d” for “definition”. You don’t have to use shorthand, though! Your tag can be a word (or hyphenated words), but don’t add spaces or you’ll have just completed the tag and started making a normal note.
Tags will be visible anywhere you are reviewing the tagged highlight, such as during daily review or when reviewing the document. From the web, you can also go to tags , see your tags, and see all the highlights with that tag.
Note: as with headings, I recommend you don’t go overboard here. It’s easy to waste a lot of time on tags you won’t use. It’s easy to add them later, so feel free to be sparing.
Sometimes, you don’t know you want to tag something while you’re highlighting, but later you decide to in one of these situations:
- you’re reviewing highlights from a document or your daily highlights
- a theme has started to emerge in your highlights
- you’re researching a topic within your notes
That’s fine! You can easily add tags during daily review (“T” if you like keyboard shortcuts) or when reviewing a document. I do a lot of each of those bullets above. I now use “mental-model”, “health”, “coaching”, “reflection”, “security”, “attention”, “resilient”, and “curious” heavily, but often later, during review.
Final tip on tags: tag conversion.
Remember how I said I use “.d” for definition? Those actually show up in my tags as “definition”, because I converted (merged) the tag. From the tag view, click the ellipses on a tag and rename, and all once-and-future uses of the old tag will become the become the new tag. So while reading I enter as “.d”, but I get “definition” in my highlights and notes. It’s a nice time-saving trick.
WARNING: I don’t know if there is a way to undo tag conversion. I don’t see one in the web interface. I’d suggest being double-sure before you go about this.
Getting Things Out
Ok, so you’re now an expert at making good highlights, tags, and notes, right? But maybe you have a favorite notes system, or you’re worried about your data. For either (or both) reasons, you’ll want to sync your highlights outside of Readwise.
The third principle for Readwise, then:
Sync Your Data
Head to the export page. There, connect your note-taking system(s) of choice, or wherever you’d like your highlights & notes to land. I have the following enabled for various reasons:
- Evernote
- Obsidian
- Roam
…but you can add others like Notion or RemNote.
Note: this is one of the other reasons you may not want to go overboard with tags. Once your notes are syncing into one of these systems, you may decide you want to tag within your note system instead of in Readwise. Before you make that call, make sure you understand how your system handles syncs from Readwise. I still use 10–15 tags when highlighting or in Readwise, and then use wiki-style links within my notes system to cross-reference certain topics. (More on that in Working with Ideas.)
It’s also a good idea to backup any important data occasionally (and these highlights and notes are important, or you wouldn’t be making them!). The syncs you setup are a soft backup, but you can make a more direct one via the CSV or Markdown export, as well.
Note: you can also export just one document as markdown, when you need it. Head to browse and from the dropdown on your document, choose “Export Highlights”.
Another Note: At this time, we cannot export highlights from Supplemental Books. You only get your own highlights. Bummer! There are probably some very good reasons for this, though, such as not getting junk into your notes that you didn’t vet first!
Working with Ideas
Ok, so you have a collection of highlights and annotations and it’s backed up and available in your notes. So what? It’s no good to you if you don’t do anything with it! With that in mind, I’ll share the ways that I get the most out of what I put in.
Daily Review
Here’s my fourth principle for Readwise:
Never Miss a Review
While you’re still building the habit, you can use this common habit-building rule, instead:
Never Miss Twice in a Row
The Daily Review is the cornerstone of the value I receive from Readwise. Head over here to configure your review.
Here’s my basic setup:
- Sent every morning at 7
- Max out (15) highlights per day
- Blended old/new recency rate
- Bonus highlights off (I have other good recommendation sources)
- Quality filter off (I’d prefer to fix it)
- “Normal” frequency for books, articles, tweets
- Slightly-lower frequency for “supplemental books”
You, of course, can tune these settings to suit your needs. If you’re just building the review habit, you may want to start with fewer highlights, for example, to make it easier to build the habit.
During the daily review, I’m doing a few things:
- Increasing retention of key points
- Adding tags when I see themes emerging
- Cleaning up and annotating
- Getting inspiration
- Making the highlights “talk to each other”
Retention (#1) happens naturally through the process, but I accelerate it. When I come across a challenging highlight or something that caught me by surprise, I hit the feedback button and choose “soon” or “later” instead of the default “someday”. This means I’m going to see that highlight again sooner.
And though my overall review frequencies are balanced, I do sometimes select the dropdown on a highlight and “show this doc more often” (or less often), to tune the amount of highlights I am seeing from a certain book or article.
I mentioned adding tags (#2) in Making Highlights and Notes. This normally happens when I’m noticing topics that I’m highlighting frequently, or which are becoming a common topic in my reading or research. I am very interested in attention and focus, so I have started tagging items related to those topics. I also read things related to health and longevity, so I have started tagging items with actionable advice. I also have two themes that are very important to me: curiosity and resilience, so I have developed tags related to those. You will come up with your own themes!
Cleaning up and annotating (#3) can be:
- removing bad or no-longer-useful highlights (using the “discard” button)
- fixing highlight or note errors (it happens, especially if they are ones you put in by hand or OCR, see Getting Things In)
- making highlights within the highlights (use double underscores around the part you want to highlight)
- adding new commentary
A common example would be when I don’t remember the context of a highlight, so I add a short note about what it means (perhaps after visiting the document highlights to see the surrounding highlights and structure).
Tip: Don’t feel bad about discarding highlights, especially from Supplemental Books, where they are someone else’s highlight. Discards don’t fully go away. Your discards go into a category named as such, and can be recovered. I’ve got 1276 discards!
Regarding inspiration (#4), some highlights will make me want to start a blog post or put a task on my planner/calendar. Let your highlights provoke you!
The last topic, highlight-collision (#5), is perhaps the most important, and is the reason why I max out my review to 15 highlights. I’m not just reviewing 15 highlights…I’m reviewing 15 highlights together. That means great chances for serendipity. Sometimes highlights will reinforce one another. Sometimes they will be in tension. Sometimes they will interact in such a way as to spark a new idea. These are magic moments. Dig in to what you are noticing. Add notes (either in the highlight or in your own system) about their interaction. Write a blog post. Make some art. Invent something. Run with it. Feel free to tell me what you learned or created.
If you practice zettelkasten, evergreen notes, or a related system, this moment of organized serendipity is a good time to write connecting comments or notes. I use backlicks in Obsidian to accomplish this.
Book Review
When I’ve completed a work of non-fiction (or even a work of fiction where I took more than a handful of highlights), I like to make sure all my notes are in order. I go back to the web view and check my structure (remember Headings?), my highlights, notes, and tags.
This is a good way to refresh myself of everything in the book, and is a jumpstart on spaced-repetition/retention. I may add Supplemental Highlights if I want to see what others highlighted, too.
This is also a good time to write a book review, even if it’s a short one.
Play Favorites
You may have noticed during your daily review, or book review, that you can mark a highlight as a favorite. Go ahead, do it!
Sunday Daily Review collections are special, and will contain only favorites. This is a good way to keep coming back to the highlights that are very meaningful for you. This leads us to…
Show Your Work
You can also let people subscribe to an email with a sampling of your favorites, one or more collections of tags, some combination of these, or all your highlights. Mine is set to a weekly broadcast with a sampling from my personal favorites and reflection questions.
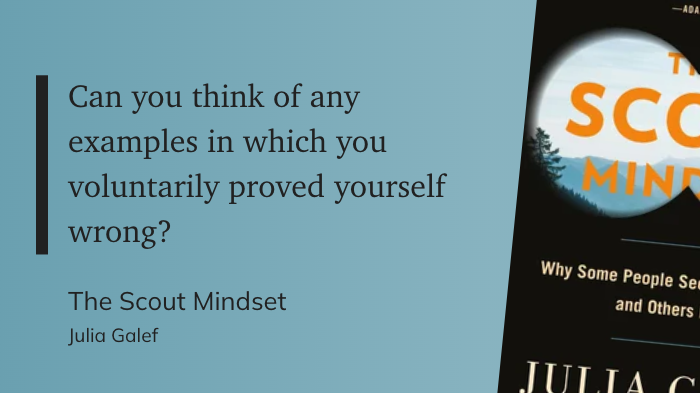
But what I like even more than the subscription is the share button. When you are reviewing a highlight, hit the share arrow, and you’ll be presented with a few options to present an elegant version of your highlight, like this highlight I have tagged as “reflection”:
I often share this way during the Sunday Favorites Daily Review (like these). I also find these shares to be a fun way to place a highlight into my notes, especially if I’m collecting a few highlights on a topic.
Finally, if the notes system where you are highlighting your notes supports it, you can publish your highlights there, as well. All of my highlights are currently public, via Obsidian.
Conclusion
You’ve hopefully picked up four principles:
- On input: Send Everything In
- On highlighting: Start Simple
- On output: Sync Your Data
- On usage: Never Miss a Review
I hope these will help you make the most of Readwise and help you with recall, reflection, inspiration, and creation.
This was already very long. Here are some advanced topics I didn’t cover:
- Themed Reviews
- Flashcards
- Metadata
- Document Tags
- Reader!
Contact me if you’d like to discuss any of these.
It looks like it's not tied into only the Apple world. That's nice.
Thanks. Saved it for future reference. I, too, recommend Readwise though you've dug in deeper.
@pimoore Thanks!
funny didnt even see this post until i went looking for more